Setup wizard
First screen of /setup-wizard asks where the team spends the day. Later it asks the company name, whether time off is days or hours, and the workplace name. It does not save a street address or a map pin. There is no /setup/wizard page.
/setup-wizard
Roles
Company admin
The setup wizard is at /setup-wizard. There is no page at /setup/wizard. If you are already on the first screen, answer where the team spends the day. Do not leave for the dashboard, company details, or work locations first. Nothing is saved until you complete setup.
What it is
A short, guided flow (shown as Step 1 of 4 through completion) that writes settings onto your company record. It’s not a tutorial page—it changes real toggles: modules like time tracking and mileage, time-off units, hours-per-workday, optional payroll/compensation features, and whether new employees default to GPS-verified clock-ins. The wizard’s GPS default is clock-in must be at a work location. Showing staff on the live map is a later Clock-rules toggle, not this step.
Who it’s for
New administrators finishing trial or paid signup, or anyone consolidating options after creating the company. Regular employees and managers do not access this screen.
The steps
- Where does the team spend the day? — This is the first screen. Choose one workplace, more than one site, client sites, or remote. If they come to the office first and then go out, choose client sites. Ask a question in the box on that screen if you are unsure. You are already in setup. Do not open another page first.
- What do you need to track? — Time off / PTO is always on. You can enable clock in & out, mileage, overtime, custom leave types (then manage at /admin/leave-types), and compensation & payroll if your plan uses them — then maintain pay records at /admin/compensation, run payroll at /admin/payroll, and use the job offer wizard (/offers/create) for new hires. These switches are filled in from your answers and shown on the review.
- How do you measure time off? — Choose days only, hours only, or both (recommended). For days or both, set hours per workday (used when converting between days and hours).
- Clock-in defaults? — Shown only if you enabled time tracking: GPS validation, whether staff need a schedule to clock in (offices that punch without a weekly roster can turn this off), breaks, and photos. Turn on Live location during shifts later under Company settings → Clock (see Company settings).
- Finish — Review and complete; the app marks setup as done and returns you to the dashboard (or your configured next step).
When you see it
If setup isn’t finished yet, visiting the main dashboard as an admin can redirect you into the wizard until you complete it. After that, you can still reopen it anytime from Company settings or admin shortcuts (e.g. Re-run Setup Wizard) to adjust the same kinds of options.
After completion
Enabled modules appear in the navigation; leave, calendar, and approvals behave according to the units you chose. You can refine details later in Company settings and feature-specific admin pages— the wizard is the fast path to a correct baseline.
Product screenshot
Automated capture: step 1 — What do you need to track? (demo company admin).
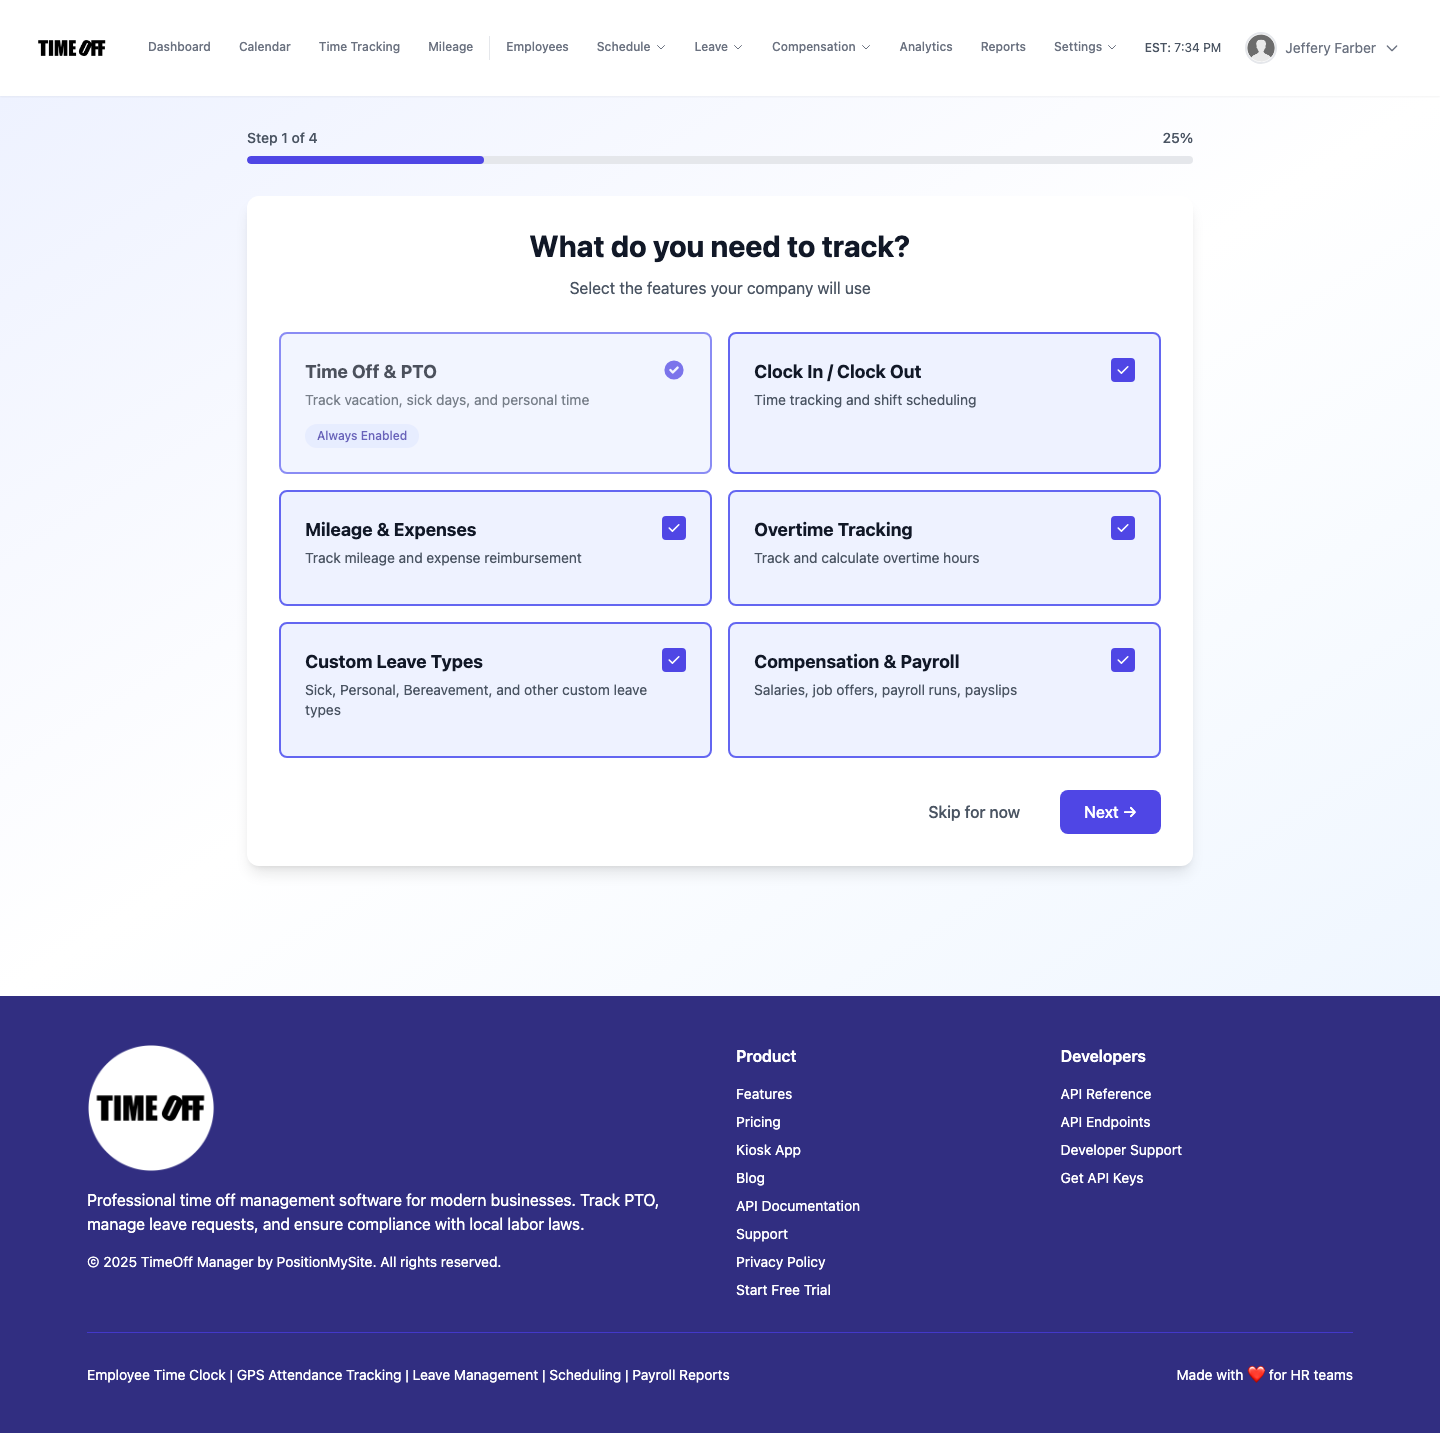
Setup wizard — step 1 (Acme demo).